

Would you like to record audiobooks at home? This a great route if you have a well-performing ebook and paperback book because it will allow more fans to reach you. Many authors also create their own audiobooks to save money. In addition, fans love audiobooks directly from the author because it’s more personal and allows them to feel more connected to the writer.
This post is for authors who have completed their ebook and paperback book, and are now ready to tackle creating their audiobook. The audiobook will be uploaded to Audible/Audiobook Creation Exchange (ACX), which are both Amazon companies. Audible sells audiobooks while ACX helps authors turn their paperback books or ebooks into audiobooks.
Below are the main categories to record and upload your audiobook on Audible/ACX.
Creation Time – This is the section where you plan the time needed to produce your audiobook
Total Costs – In this portion, you’ll plan for the amount of money needed for production.
Pre-Production – This is the segment where you prepare to record.
- Audiobook Script Creation
- Microphone Placement
- Voice Preparation
- Home Studio Treatment
- Audiobook Equipment
Production – In this part, you’ll learn how to record your audio files.
- Narration
Post-Production – This is the section that helps you edit, proof, and master your audio files.
- Editing
- Proofing
- Mastering
Uploading Audio Files – In this segment, you’ll learn about ACX’s audio file requirements, and how to upload those files.
Continue to the next section to learning more about recording audiobooks.

Creation Time
Determining the total time for audiobook production or recording, helps you plan for all of the stages of production. The time you may need during the Planning and Pre-Production stages depends on how experienced you’re at narrating and the length of your audiobook.
Before you start you’ll need to decide how much time you’ll need for Pre-Production and Production.
Pre-Production
The phase where you get ready to record your audiobook is pre-production. This step includes creating your audiobook script, preparing your voice, treating your home studio, and deciding where to place your microphone.
If this is the first time you’re narrating an audiobook, plan on a couple of weeks or more. It takes time to create an audiobook script and treat a home studio. Below is a table that lists the estimated amount of time you may need for each segment if you’re a beginner.
| Description | Time to Complete* |
| Audiobook Script Creation | 2 weeks or more |
| Voice Preparation | 15 to 30 minutes per day |
| Home Studio Treatment | 1 day |
| Audiobook Equipment | 1 month |
* Note that these times are meant to be concurrent. They are based on estimates for a beginner and will be shorter for an author more experienced with narration.
Production & Post-Production
Recording your audiobook is the production phase whereas editing, proofing, and mastering is post-production. This segment consists of narrating, editing, proofing, and mastering. The time to finish each portion is calculated using per finished hour (PFH) rates.
For example, if you’re reading a non-fiction book that contains 60,000 words, it will result in a completed audiobook that is about 6.5 hours long. Therefore, 2 hours of narration will result in 1 finished hour of the audiobook. For a 6.5-hour long audiobook, the total time for narration is the rate times the total finished hours.
2 PFH x 6.5 finished hours = 13 narration hours.
The table below summarizes the total time needed to create a 6.5-hour long audiobook.
| Description | Rate (PFH) | Total Time (hours) |
| Narration | 2 | 13 |
| Editing | 3 | 19.5 |
| Proofing | 1.2 | 7.8 |
| Mastering | 0.5 | 3.3 |
If you would like to more detailed information on how long it takes to make an audiobook, take a look at my post How Long Does It Take to Record an Audiobook.

Total Costs
Part of planning to make an audiobook includes budgeting. In this section, I’ll assume that you’re an author narrating your own audiobook. If you have to pay for a narrator, you could pay $1700 for a 6.5-hour audiobook. However, if you record your own audiobook, you’ll save that expense and only spend money on other items like the cover art, ISBN, and recording equipment. The table below summarizes the costs to make an audiobook.
| Description | Cost |
| Audiobook Cover Art | $300** |
| Audiobook ISBN | $125 |
| Recording Equipment | $202 |
| Total | $627 |
** Based on audiobook cover art from 99Designs.
Audiobook Cover Art
The most important marketing aspect of your audiobook is the cover art. Imagine an Audible customer browsing through the online store past hundreds or even thousands of audiobooks. What will make this listener stop at your audiobook? The cover!
The cover art is the first thing a customer sees and it needs to be good enough to make them stop and click on your audiobook. An inexpensive graphic designer on Fiverr may charge $5 to $10. However, a decent designer will charge around $300 to $500. A designer who is familiar with your genre and may work for a publishing house could charge around $1000.
International Standard Book Number (ISBN)
You’ll need an ISBN if you’re planning to sell your audiobook in physical stores and libraries. The ISBN is a product number that links your title, author name, edition, etc.
Audible offers a free ISBN, however that means Amazon owns the ISBN, not you. You won’t be able to put your audiobook on any other platform. This could be ideal if you’re planning to use Audible’s exclusive contract. However, if you intend to put your audiobook in other online stores and libraries, this won’t be the best option for you.
Bowkers is the only company that sells ISBN’s in the US. The price is $125 for an ISBN. However, they offer significant discounts if you buy in bulk. I have purchased several ISBN’s and found their website to be fairly easy to navigate.
Audiobook Recording Equipment
Since you’re planning to use your home studio to record your audiobook, you’ll need audiobook recording equipment. You’ll need a microphone, headphones, digital interface, and editing software. The most important equipment you can purchase is your microphone. Purchase the highest equality that still fits into your budget.
Section Audiobook Equipment has more information about the equipment you should purchase for your home studio.
If you would like to learn more about the cost to create an audiobook, take a look at my article How Much Does It Cost to Make an Audiobook.

Pre-Production
Audiobook Script Creation
The audiobook script is a set of instructions that tells the narrator how to say the manuscript’s words during recording. If you’re new to narration, I recommend starting with a non-fiction book. The advantage is that you’ll not have to change your voice for different characters.
Many authors start narrating with non-fiction books. These audiobooks usually require a straight-read that means you’ll speak in your natural voice while clearly pronouncing your words.
Creating an audiobook script could take 2 or more weeks. It has three phases that include production notes, script platform, and markups.
Production Notes
You should capture information about the tone of the audiobook, details of the characters, pacing of the audiobook, and pronunciation instructions in your production notes. These notes are particularly important when the author and narrator aren’t the same. But, even if you’re the author and narrator, you should still take some time to think about these points.
When you prepare your production notes, write down the overall feeling of the book. Is it happy, sad, or something else? Is the tone warm and light-hearted or cold and dark? Is the pacing fast and urgent or slow and methodical? Are there any words that will be hard to pronounce? How does each character sound? Is the voice slow and creaky or fast with a high squeaky tone?
Working through the production notes will help you to more accurately narrate the true intent of the story. In addition, you’ll achieve characters that sound as if they’ve stepped out of the pages of the audiobook.
Script Platform
Next, you’ll need to choose your audiobook script’s platform. This means you need to decide how you want to annotate your script. You could use simple paper and pencil. Print out the manuscript and add narration directions where you need them. The downside of this method is that papers rustle and the sound could be picked up by your microphone.
You could also use iAnnotate, which is software designed to annotate manuscripts. This software helps you easily add markups to your script.
You can also use Microsoft Word 365. This software has the same advantage as iAnnotate. You can more easily add markups by simply using the copy and paste features. However, this software has one more advantage because it can sync between your phone, iPad, and desktop.
Markups
The last step is to mark up your manuscript. The best markings to use are the ones that are clear to you. However, there are some common practices you could use if you’re interested. For example, a ‘/’ is used for pause. You can add more pauses in your sentences for more effect. Use an underline to emphasize words.
Some markups include changing sentences to make them clearer for a listener. For example, a sentence like “Look at Table 2 on page 12” isn’t clear because the listener won’t have the ebook or paperback book. The solution is to place all images from your manuscript into a separate PDF and attach it to your audiobook. Audible allows authors to place companion materials with their audiobooks.
Instead, your markup should change the example sentence to “Look at the companion material for Table 2.” You’ll need to make the same changes for any images or figures or tables that you reference.
Changing your manuscript into an audiobook script will take some time. I generally allow for four days, however, you may need more time depending on the length of your manuscript.
If you would like to learn more about creating an audiobook script, take a look at my article How Do You Write an Audiobook Script.
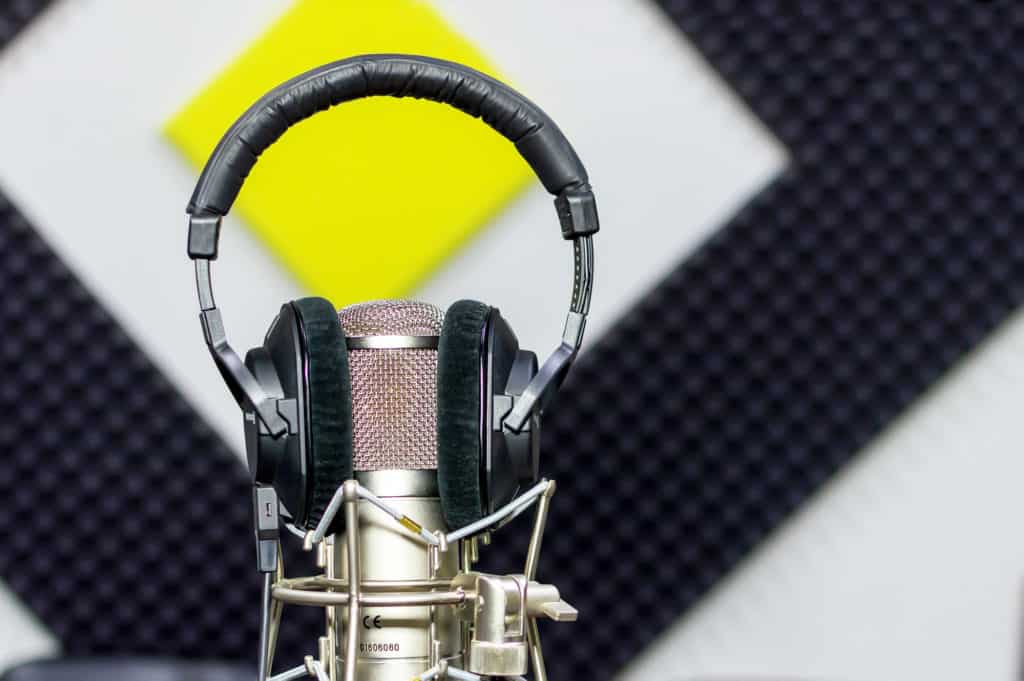
Microphone Placement
Your microphone is probably the most important piece of equipment in your studio. Therefore, how you use your microphone is vital to creating great-sounding audiobooks.
Ideally, your microphone should be 6-10 inches from your face. However, this varies depending on your voice and the type of microphone you’re using.
While recording, you should try to speak directly into the mic. Don’t turn your head from side-to-side because the higher frequencies of your voice will be lost. The result is your voice will change unintentionally during narration.
The best way to position yourself with your mic is to:
- Sit on a stool.
- Position the microphone upside down above your head, but 6 to 10 inches from your face.
- Arrange the mic so that the bottom is level with your eyes.
- Position your audiobook script so that the top is level with your eyes.
- Place your pop filter 2 inches from the microphone.
If you’re interested in more information about how to position your microphone, take a look at my article How Far Should My Microphone Be From My Face.
Voice Preparation
Taking the time to prepare your voice helps you to create a great sounding recording. If you’re new to recording, you may not understand how difficult it is to speak for several hours. It’s best to prepare your body for the vocal marathon. Start this phase at least a week before recording. It should take about 15 to 30 minutes per day.
Begin your voice preparation by making and practicing your audiobook script. If you would like to learn more, see section Audiobook Script Creation. Continue by following the steps below.
Step 1: Eat Foods That Help Your Vocal Cords
Foods that are good for your voice include fresh fruit, vegetables, nuts, seeds, and meat (unprocessed). However, make sure that these foods don’t aggravate any existing conditions you may have. You want to make sure that you aren’t eating foods that will cause heartburn.
Some foods to avoid include any sort of dairy and any foods with processed sugar. These foods form mucus on your vocal cords making it more difficult to speak. You should also avoid caffeine and alcohol because these drinks dehydrate you. This is hard on your vocal cords and makes it harder to speak clearly.
Step 2: Stay Hydrated
It is crucial that you stay hydrated before and during recording. Water is extremely good for your vocal cords. It helps if you need to give up caffeine for a week or so. It will also keep your lips moisturized as you speak for hours during the day.
The amount of water you need will depend on your body and how long you’re narrating. Keep a few bottles near you during narration and sip during all of your breaks.
Step 3: Get a Good Night’s Sleep
Obviously, if you sleep well the day before narration, you’ll wake up refreshed and fully energized. What you may not know is your vocal cords are more prone to damage when you’re tired. This is especially important on long narration days.
Step 4: Pamper Yourself
It may be strange to include a step to pamper yourself, but this step helps you to feel more comfortable as well as help create a better recording. This step starts with pampering your voice so that you don’t do anything to cause strain before you begin recording. For example, going to loud outdoor places where you have to raise your voice will stress your vocal cords. In addition, you should make sure that you keep your throat warm with a scarf around your neck.
Pampering yourself includes wearing soft clothing. It won’t rustle while you’re recording and soft clothing is comfortable. Also, you should eat lightly. Eat until you’re full, but don’t overeat.
Step 5: Do Vocal Warm-Ups
Before you begin recording, vocal warm-ups are the best way to prepare your vocal cords for the coming narration. Vocal warm-ups have four main components. They include gentle stretches of your upper torso and neck. For example, turning your head to the right, left, up, and down, rolling your shoulders, and bending side-to-side at the waist. These stretches are all slow and gentle and should not cause any pain or dizziness. If you have any of these symptoms stop and rest. Also, if they persist, call your doctor.
The next main component of vocal warm-ups includes yawning. This sounds a little unusual, but yawning relaxes your vocal cords. It’s perfect to do before and during a recording session.
The next component of vocal warm-ups is practicing exaggerated letter enunciation. This includes practicing hard consonants like ‘D,’ ‘P,’ ‘T,’ etc. This is followed by practicing vowel sounds like ‘A,’ ‘E,’ ‘I,’ etc. Next, you’ll need to put the consonants and vowels together.
If you would like to learn more about letter enunciation, take a look at this vocal coach, Gary Terzza, in this video Vocal Warm-Ups for Voice Over.
The last component of vocal warm-ups is practicing tongue twisters like ‘Peter Piper picked a peck of pickled peppers.’ There are several tongue twisters you could find, however, I recommend this vocal coach, Rodney Saulsberry. He has many years of experience coaching and this is his book Tongue Twisters and Vocal Warm-Ups.
Step 6: Bring Water, Lip Moisturizer, and Small Snacks to Your Recording Session
As I stated earlier, you’ll achieve your best recording when you’re comfortable during your recording sessions. Therefore, take frequent breaks and drink water. In addition, use moisturizer to keep your lips from drying out and cracking. Finally, eat small snacks that are easy to digest like fruit or vegetables.
If you would like to learn more about voice preparation before recording your audiobook, take a look at my article How Do You Prepare Your Voice Before Recording Your Audiobook.

Home Studio Treatment
An important component to preparing for narration is finding or creating a quiet space to convert into a studio. It needs to be a quiet place in your home. Make sure it’s away from the air conditioner, refrigerator, or any other noisy electronics. In addition, it cannot be a large room or a small room with hard surfaces because these types of rooms create echoes.
Ideally, you should use a large closet or small room. Specifically, I mean a space large enough for a small desk and chair. Once you’ve chosen this space, you’ll need to treat it. This means that you’ll cover the walls, floor, and sometimes ceiling with soft materials to reduce echoes. It should take about a day to treat your home studio.
There are several options you could use, but here I’m only going to mention three because they’re free and perfect for an author new to narration.
- Heavy Fabric & Small Room – This option requires a small room where you can hang heavy fabrics to the wall and lay them on the floor. These fabrics could be old curtains, blankets, etc.
- Comforter & Closet – In this option, you use a closet large enough for a small desk and a chair. You should hang fabrics on the wall and door. In addition, you can stuff the area above the shelf with folded blankets or anything soft. The types of fabrics you can use are blankets, comforters, quilts, etc.
- Mattress Fort – This option is probably the simplest. Purchase three inexpensive mattresses and create a fort. Two mattresses will stand parallel to each other and one mattress will lie across the top. You won’t be able to fit a desk and chair in the fort. Instead, you have to sit on the floor or a pillow while recording.
These options have the distinct advantage of being beginner-friendly, however if you have more budget you could purchase acoustic panels, acoustic shields, or a ready-made sound booth.
If you would like to learn more about home studios, take a look at my article Audiobook Recording Home Studio Tips.
Audiobook Equipment
Authors who are interested in narrating their own manuscripts should start with a home studio and that includes recording equipment.
My article What Equipment Do You Need to Record Audiobooks lists the exact audiobook recording equipment I recommend. However, learning to use the equipment could take some practice. If you have never used any of the audiobook equipment, allow yourself a month to practice recording your voice, editing, proofing, and mastering your audio files.
Below is a table that summarizes the types of equipment you’ll need as well as the typical prices.
| Equipment | Cost |
| Microphone | $60 |
| Mic Boom Arm | $40 |
| Pop Filter | $12 |
| Headphones | $90 |
| Digital Audio Workstation (DAW) | Free |
| Total | $202 |
Your most important expense is the microphone. I recommend a condenser microphone because it’s sensitive and accurate. This makes it perfect for narration.
If you’re a beginner, I recommend a USB microphone. These microphones are easy to set up because they plug directly into your computer. They don’t need an external power source like a digital interface. However, they still provide a superior sound that will pass ACX’s audio requirements.
The microphone boom arm is the support for your microphone. It holds your mic in place while you’re narrating your audiobook. You may want to suspend your microphone upside down and above your mouth. This way you’re talking past the microphone and limiting the popping sounds you get while pronouncing hard consonants.
A pop filter is the best way to reduce extra sounds you get from pronouncing hard consonant sounds like ‘P’ and ‘B.’ This filter is a circular diaphragm that protects the microphone.
Headphones are a great way to catch errors while you’re recording. The best are closed back headphones because they don’t allow sound to escape and corrupt your recording.
you’ll need software or a Digital Audio Workstation (DAW) to edit and master your audio files. Two types are free: Audacity for PC and GarageBand for Mac. I recommend either of these for beginners.
If you would like to learn exactly which home studio equipment I recommend, take a look at my article What Equipment Do You Need to Record Audiobooks.

Production
Narration
When you’re an author interested in narrating your audiobook, there are a few tips to keep in mind so that you create a great listening experience for your fans. I’ll assume that you’ve created your paperback book and ebook, therefore you’re ready to start recording your audiobook. Below are the tips I recommend to create an audiobook that conveys your ideas.
Before you begin your narration, make and practice your audiobook script. If you would like to learn more, see section Audiobook Script Creation.
Sound Engaged
As an author narrating your own manuscript, it’ll be natural to sound engaged. It’s your material that you feel strongly about and that should come through during the recording. However, you’ll have trouble if you’re too nervous during the recording. The result is that you may stand stiffly while trying to narrate with a squeaky voice.
The solution is to stay engaged with your audiobook script. Concentrate on the words you’re reading instead of reading ahead. Stand up and gesture with your whole body (as appropriate) to convey the emotions of your work. Also, engage your facial expressions so that they match your emotions.
Your listener won’t be able to see your gestures and facial expressions, but they will hear the emotion that you’re trying to convey.
Sound Credible
Usually, an author narrating their own work sounds credible. However, if the author is nervous, they may not sound knowledgeable about their own topic. There are two ways to correct this issue. First, calm down by taking deep breaths, yawning frequently, and slowing down your narration. Second, intentionally inflect your voice down at the end of sentences.
When you calm down, you speak from the lower part of your diaphragm. This makes your voice sound more natural or conversational instead of high and squeaky. When you inflect down at the end of sentences, you sound like an expert. As experts speak, they slow down and inflect downward showing that they are comfortable with their topic.
Narrate Consistently
As you narrate from day-to-day, you should do your best to sound the same on your audio files. The reason is that the listener will probably hear your words in longer chunks of time and changes in your tone will decrease the listener’s experience.
For example, if you produce a 60,000-word book, the result should be a 6.5-hour audiobook. However, it will take about 40 hours to produce that audiobook. This means you’ll be recording several hours a day for several days. Therefore, a listener may hear a 4-hour section of the completed audiobook. However, it may have taken you 2 or 3 days to record that portion.
Breathe
If you’re nervous while recording your audiobook, you may take several short raspy breaths. These breaths may become irritating to the listener. The best way to avoid nervous breathing is to slow down and take deep breaths.
In addition, you can try reading through your audiobook script while paying attention to your normal breathing. When you’re ready, record your voice, but continue to pay attention to your breathing. The result should be natural breathing.
Stand and Gesture with Your Body
When you stand and gesture with your body, you put more inflection in your voice. Your listener can’t see you standing nor can they see your gestures, but they will hear the difference in your voice. Standing and gesturing also helps get rid of nervous energy and helps you connect more with what you’re saying as well as who is listening.
Pronounce Words Clearly
Clearly enunciate your words as you speak. I know this may seem obvious, but it’s something to watch out for because nervous authors start to rush and slur their words.
Garbled words are really the result of nervousness and the remedy is similar to what I’ve mentioned in the previous sections. To help you speak your words clearly, slow down, and take deep breaths.
Stay in the Moment
There are two schools of thought about reading while recording. The first is to read ahead a little bit so that you know what is coming and you won’t be surprised by the text.
The second school of thought is to only focus on the words you’re reading. This allows the author to concentrate on the words they are currently reading. The advantage of focusing is you can stay in the moment and truly convey the thoughts and emotions that are attached to your spoken words.
Sound Warm and Natural
Generally, when an author is reading their own work, it’s easy to sound warm and natural or conversational. It’s only nervousness, that can cause the author to speak too quickly or with a high squeaky voice.
If you’re calm and can speak with a conversational tone, the listener will hear the difference and enjoy the audiobook that much more.
Read with Modulation
If an author is nervous, they may read with a pinched voice or a dull flat voice. This is the opposite of what you’re trying to achieve. You’ll want a modulated conversational tone that will immediately get your listener’s attention.
Stay Hydrated
When you’re new to narration, you may not realize how quickly your mouth and vocal cords dry out. As you speak, you lose moisture through your mouth. In addition, to drying out your mouth, the number of mouth noises (i.e. clicks and pops) will increase.
The obvious remedy is to take lots of water breaks. Schedule these in, so that you don’t go too long without taking a needed sip of water.
Read with Confidence
Self-confidence is the most important element you can bring to your recording sessions. This is the thing that will help you decrease nervousness, add modulation to your voice, and help you speak in a warm conversational tone.
In addition, you’ll find it easier to gesture naturally while automatically creating engagement and credibility.
These narration tips will help you to sound like an expert who is engaged and credible during the recording. If you would like to learn more about voice narration, take a look at my article 11 Voice Narration Tips for Authors. After you create your recording, you’ll need to edit the audio files. Continue to the next section to learn about editing.

Post-Production
Editing
Editing an audiobook means that you remove unwanted noises like mouth clicks and pops. It also includes modifying the pacing as needed and keeping track of areas that require rerecording.
Below are a few tips that an author new to editing could use on their audio files. I’ve grouped these tips into three sections: Hardware, Editing Tips, ACX Requirements.
Hardware
In this section, I’ll assume that you’ve never done any editing before. If you have you can skip ahead to the Editing Tips section.
Your first piece of hardware should be a microphone. A good microphone creates a great sounding narration. If you start with a mediocre mic, it’ll make editing and mastering much more difficult. I recommend starting with a high-quality USB microphone. These microphones are reasonably priced while creating a good sound. This is perfect for authors new to narration.
Next, you’ll need a computer. You don’t need to run out and buy one—most people have access to a computer in their homes. However, the reason you need a computer is to run editing/mastering software.
If your computer is a PC, I recommend that you start with Audacity. This software is a digital audio workstation (DAW) that is designed for editing and mastering audio recording. Audacity is free, but it has limited features.
If your computer is a Mac, I recommend starting with GarageBand because it’s free. Both Audacity and GarageBand are excellent starting DAWs for beginners.
Use headphones to hear your recording the way a listener would hear it. You should use studio quality headphones. While you’re narrating your audiobook, listen for mouth noises, background sounds, echoes, etc. Your goal is to try to catch any extraneous sounds.
If you would like to learn more about audiobook recording equipment, take a look at my article What Equipment Do You Need to Record Audiobooks.
Editing Tips
If you’re new to editing, these tips will help get you started. However, if you’re a beginner, I suggest doing the editing and then having a professional also edit your raw files. The reason for this is so that you can learn. A second option is to take an editing class.
You should start every day by recording a few seconds of room tone. This is just the sound of your studio with the equipment on, but without you speaking. You’ll use this room tone as filler if you need to remove mouth noises or other erroneous sounds.
I recommend that you also mark your files when you make an error while recording. This can be as simple as a hand clap or you may use a clicker. You just need something that will make it obvious you need to edit the file.
While you’re removing dead spaces or removing unwanted noises, you should add a crossfade. These crossfades will seamlessly transition between the period before and after your edit.
Keep in mind that you won’t want to remove all breaths. A large number of loud breaths may be irritating to the listener. However, audible breaths from a narrator, who is racing through a fast-paced segment, add to the tension and should not be removed.
You may not be able to remove a breath and may have to decrease it’s volume instead. Knowing when to remove or lower the levels of breaths is an art. You’ll need some practice and possibly the help of a professional.
Make notes where you’ll need to rerecord segments of the narration. Sometimes it’s faster to rerecord than trying to edit extraneous sounds.
ACX Requirements
If you want to sell your audiobook on Audible/ACX, Findaway Voices, or other platforms, you’ll need to format your audio files. This formatting includes having a uniform sound, containing opening and closing credits, have all mono or stereo files, and a retail audio sample.
In addition, each file should contain only one chapter. Each chapter should have a few seconds of room tone at the beginning and end. There are more requirements for mastering that I will cover in the next section.
These editing tips will help you create the best sounding audio files. If you would like to learn more about audiobook editing, take a look at my article 19 Audiobook Editing Tips. After you’ve edited your audio files, you’ll need to proof them to make sure there are no obvious mistakes. Continue to the next section to learn about proofing.
Proofing
Audiobook proofing is the process of listening to an edited audiobook critically. You should use headphones because your listener is more likely to use then. Also, you should listen in small chunks of time so that you can stay focused.
When you proof an audio file you’re listening for repeated phrases that should have been deleted or outtakes. Also, you should check for proper narration such as word emphasis and pauses. Other narration elements to check for include consistent accents or pronunciations, erroneous sounds, and quiet gaps that should be filled with room tone.
As you listen to your audio file, place markers in your audio recording. If you don’t have software to perform this task, mark up your audiobook script, and keep a log of the errors.
This is a long tedious process, but it is vital to producing a great listening experience. Generally, for each hour of the finished audiobook, you’ll need to spend 1.2 hours proofing.
Some important proofing tips include following along with the audiobook script while you listen to the audiobook. Also, don’t try to edit while proofing because you’re more likely to make additional mistakes.
If you’re new to narration, I strongly recommend having someone else proof your audiobook after you proof it first. There are some errors that you won’t notice, but a fresh set of ears will.
If you would like to learn more about proofing audiobooks, take a look at my article What is Audiobook Proofing.
Mastering
The final step before submitting your files to ACX for review is mastering. This is the process of taking a good recording and making it sound great. These are the processes for mastering which include ACX mastering requirements, noise reduction, compression, normalization, and RMS & peak values.
ACX Mastering Requirements
These are the requirements set by ACX, online audiobook stores, and distributors.
To begin, decibels (dB) are a scale that measures loudness. In audio recording equipment, 0dB is the loudest sound before it becomes distorted. In addition, -6dB is half as loud as 0dB.
- The RMS (average loudness) of your audio files should measure between -23dB and -18dB RMS.
- The peak values (maximum loudness of audio file) should hover around -3dB.
- The noise floor should fall between -60dB and -50dB.
- The files should be MP3 (one of many audiobook formats) at 192kps, Constant Bit Rate (CBR).
- The sample rate should be 44.1 kHz (frequency).
- All files must be in mono or stereo, but not a combination of both.
If you would like to learn more about ACX’s mastering requirements, check the ACX website article ACX Audio Submission Requirements.
Noise Reduction
In this segment of mastering, you’ll need to remove background noise from your audio file. You can do this with a plugin for your DAW called an equalizer. The equalizer works by removing or filtering out extraneous noise caused by a computer fan, air conditioner, refrigerator, etc. Low frequencies may sound like hums while high frequencies may sound like hisses. If you leave these sounds in your audio files, they could lead to a poor listening experience.
Compression
In this portion of mastering, you should reduce the dynamic range of your audio files. The compressor works by reducing the loud parts of the narration while increasing the soft segments. This reduces the difference between the loud and soft sections of the narration. In the end, it creates a great experience for the listener.
Normalization
In this section of mastering, you should limit the loudness of your recording. You should use a plugin for your DAW called a limiter. The limiter increases the loud parts of the narration to a value you set. The ACX requirement is -3dB. This process also increases the softer portions of the narration.
RMS & Peak Values
In this part, you’ll need to check the RMS and peak values and adjust them if they don’t meet ACX’s mastering requirements. The RMS represents the average loudness of the narration whereas the peak values represent the loudest portions. Generally, more advanced DAW’s automatically adjust RMS and peak values for you.
However, if you’re using a free DAW, you may need to do this manually. The manual adjustment consists of altering the RMS to meet ACX requirements and then using the limiter to remove the peak values that exceed -3dB.
If you’re interested in learning more about audiobook mastering, take a look at my article How to Master an Audiobook.
Uploading Audio Files
Once your files are ready, you can upload them. The ACX Quality Assurance team will check your files against a long list of requirements.
File Submissions
Below are the audio file requirements from ACX.
- Each file must contain one chapter. However, each file cannot be longer than 120 minutes.
- One file must contain the opening credits (title, subtitle, author name, & narrator name).
- One file must contain the closing credits which could be as simple as “The End.”
- One file must contain a retail sample, which is a recording used for marketing.
- Each file must contain 0.5 to 1 sec of room tone at the beginning and 1 to 5 sec of room tone at the end.
If you would like to learn more about ACX’s audio file requirements, check the ACX website article ACX Audio Submission Requirements.
Editing, Proofing, and Mastering Requirements
Below are the ACX requirements for Editing, Proofing, and Mastering your audio files.
- Each file must be free of extraneous sounds such as plosives, mouth noises (see Editing Tips). Also, all files must be free of outtakes (see Proofing).
- Each file must meet ACX’s Mastering Requirements defined in the section above.
Uploading Steps
Below are the steps to upload files onto the ACX platform.
- Open an ACX account or log in.
- Choose distribution territories and the language of your audiobook.
- Verify that you’ve mastered your audiobook to ACX standards.
- Enter your audiobook’s metadata (author name, description, title, copyright information, etc.)
- Upload your files.
- Enter bank information for future royalties.
Conclusion
You’re at the end of the complete guide to audiobook recording. This guide is intended for authors new to recording audiobooks. I’ve broken it into the following categories: Creation Time, Total Costs, Pre-Production, Production, Post-Production, and Uploading Audio Files. These categories are each necessary to create a great-sounding audiobook.
Have you recorded your audiobook? Which section was the most challenging and why? Please let me know in the comments below.