
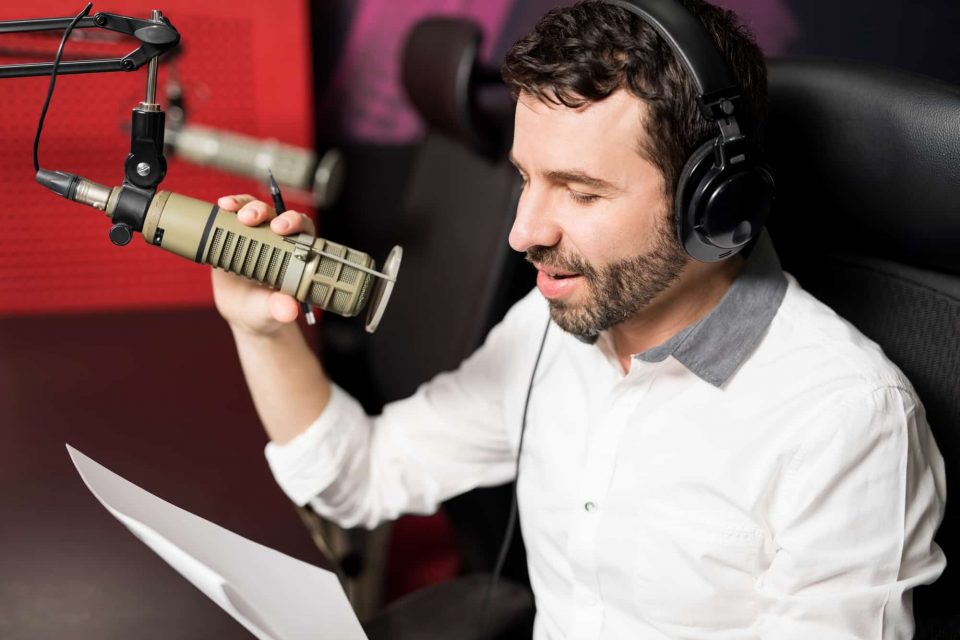
The goal of every narrator is to achieve a high quality recording. One thing you can do is pay attention to the distance between your face and your microphone. Where you place your microphone will have a direct effect on the quality of your recording.
Generally, the microphone should be 6-10 inches from the face. However, the real answer depends on the narrator’s voice, the type of microphone, and more.
As a beginning narrator, you will also have additional considerations which are covered in the list below:
- Microphone Distance From Your Mouth
- Your Microphone Set Up
- Pop Filter Distance to Your Microphone
- Reduce Microphone Background Noise
- Should You Sit or Stand
- Record a Consistent Voice Day to Day
In the rest of this article, you’ll find more details about placing your microphone, what to do about filters, how to reduce background noise, and more.

Microphone Distance From Your Mouth
When you’re narrating a long novel, you would like your mouth as close to the microphone as possible. The reason is that the microphone is very sensitive, and it would be ideal if it captured all the nuances of your voice.
However, the reality is the microphone is very sensitive, and there are some mouth noises you don’t really want it to pick up. Also, it’s almost impossible to keep the microphone from picking up other sounds in the room.
Another issue with having your microphone too close to your face is that it picks up more of the lower frequencies of your voice, making your voice sound more ‘bassy.’ Unless you’re deliberately going for that sound, as a general rule of thumb, it’s better to keep the microphone 6 to 10 inches from your face.
So what is the right distance for you? I know you’re going to hate this answer, but it depends. I recommend that you create a series of short demos where you test various distances between you and the microphone. Create as many as you feel you need.
For example, you may want to create a demo at 4 in, 6 in, 8 in, 10 in, and 12 in. Listen to all of the demos with your headphones to hear it the way an audiobook listener would hear it. As you do these demos, you’ll soon discover the distance that works best for you and your microphone.
Your Microphone Set Up
Generally speaking, when you’re setting up the microphone, the best thing to do is speak directly into the microphone. As you turn your head from side to side, the higher frequencies of your voice are lost on your microphone. The result is that your voice will sound dull.
Worse yet, if you have a nervous habit of moving from side to side, the result will be that your voice won’t sound even. Some parts will sound fine, and others will be dull. An audiobook listener will become extremely irritated during 12 hours of narration.
So as I mentioned before it’s important that you minimize head movement. However, you shouldn’t keep your neck and head rigidly stiff. The reason is that if you keep your head very still for long hours, you’ll become too uncomfortable, and this will affect your recording session.
It’s very important that you remain comfortable, so most microphones can handle some amount of head movement (maybe +/-15°) left and right or up and down. The real rule-of-thumb is to minimize head movement.
One way to minimize head movement while recording is to find a comfortable position for your microphone, audiobook script, and chair, or stool. Something you might try is this:
- Sit in a chair or stool.
- Position the microphone upside down and above your head but at the correct distance (6 to 10 inches from your face). Arrange the microphone so that the bottom of the microphone is level with your eyes.
- Position your audiobook script below you so that the top of the audiobook script is level with your eyes. However, place the audiobook script as far away as possible while still being able to read it. If you are using something with a hard screen like an iPad, tilt it slightly so that your voice won’t bound back into the microphone.
If you’re comfortable, your head shouldn’t need to move very much. As you read the audiobook script, your eyes will simply move down the page.
Pop Filter Distance to Your Microphone
Are you wondering how far the pop filter should be placed from the microphone? The purpose of the pop filter is to reduce extra sounds created by pronouncing hard consonant sounds like ‘P’ or ‘B.’ In general, the pop filter should be about 2 inches from the microphone. However, this is something that you can also experiment with.
So, what if you don’t have a pop filter? You could angle the microphone away from your face. This will definitely reduce the hard consonant pops.
However, angling the microphone from your face might distort the rest of your recorded words. Also, if you happen to move your head too much, your voice will be more distorted than if you just spoke directly into the microphone. Test various angles and record demos. You’ll improve with practice.
The other option is to remove the popping sounds during editing. If you are new to editing, this will become cumbersome. It’s better just to remove them while you are recording.
So what about sibilance?
Sibilance is a harsh sound that occurs for some narrators when they pronounce letters like ‘S,’ ‘T,’ and ‘Z.’ There are basically two methods to reduce it.
The first option you might try is to angle the microphone 10° to 15° away from the narrator. Unfortunately, if the narrator happens to move their head too far, the result will be a dull voice. This is something you can test and see how well it works.
The second option is to remove the sibilance during the editing phase. A more knowledgeable audio editor will know how to remove the harsh sounds. A newer editor may find this a bit cumbersome.
Will a pop filter help reduce sibilance? The short answer is No. It won’t do very much at all toward the sibilance.
Reduce Microphone Background Noise
So how do you reduce background noise on your microphone? A very good microphone is sensitive, which means it picks up the nuances of speech. However, a very sensitive microphone will also pick up a lot of unwanted background noise. The amount of sensitivity depends on the type of microphone, and it depends on the brand of the microphone.
- Try to keep your recording space a quiet as possible.
- Take several room tones. This means that you’re going to take a demo of the room when nobody’s speaking. Just record the ambient noise of the room. Do that a few times and listen to the noise in your headphones so that you can hear what the audiobook listener will hear when you’re recording.
- These readings can be used to remove the room tone during editing.
In addition, these room tones can be used to remove other unwanted sounds during editing.
If the background noise is high, you’ll need to find the source of the noise. If it’s something outside of your control, you might need to try to record at another time or on another day. Other options include blankets and foam walls to try to deaden the sound in your home studio. If you’re in a professional studio, this won’t be an issue as everything will be set up for you.
Should You Sit or Stand?
Are you wondering what the best position is for you while you are narrating a book? Standing will give you the most powerful reading because your diaphragm will not be encumbered. You can easily take a deep breath and release as well as speak as loudly and clearly as you need to.
If you’re reading a long book for hours at a time and weeks on end, this is not going to work. Sitting in a chair will not give you a powerful voice.
I think the stool is a good compromise. You’re not putting all of your weight on your feet for hours at a time. And, you still have better control of your diaphragm than if you were in a chair.
Record a Consistent Voice Day to Day
How do you keep recording consistently day-to-day as you perform your narration? Even though you are recording over several days or even weeks, the audiobook listener should hear one consistent voice.
Begin with your setup. When you set up your microphone, audiobook script, and stool, take detailed notes to help you remember where all these things go from day-to-day.
If you’re using sound blankets, take notes about how you’re using them, where they’re hanging, and so on. Every day check that all aspects of your home studio are the same. In a professional studio, you may have help with this.
It’s very important that you sit in the same position. Add this to your notes. You’re not a robot, and you can stand or sit in exactly the same position. Just do your best.
Remember to stay comfortable to reduce fidgeting. Wear soft, comfortable clothing that won’t make noise. Bring lots of water and snacks.
Conclusion
The recommendations in this article will be harder as you begin, but they will definitely get easier the longer you record. Many things will start to become automatic and easier to do.
If you have other tips that you use for setting up a microphone, I’d really like to hear them. Please leave comments below.